This is a 3D model of a Death Trooper helmet from the Star Wars Movie "Rougue One". (Personal Project)
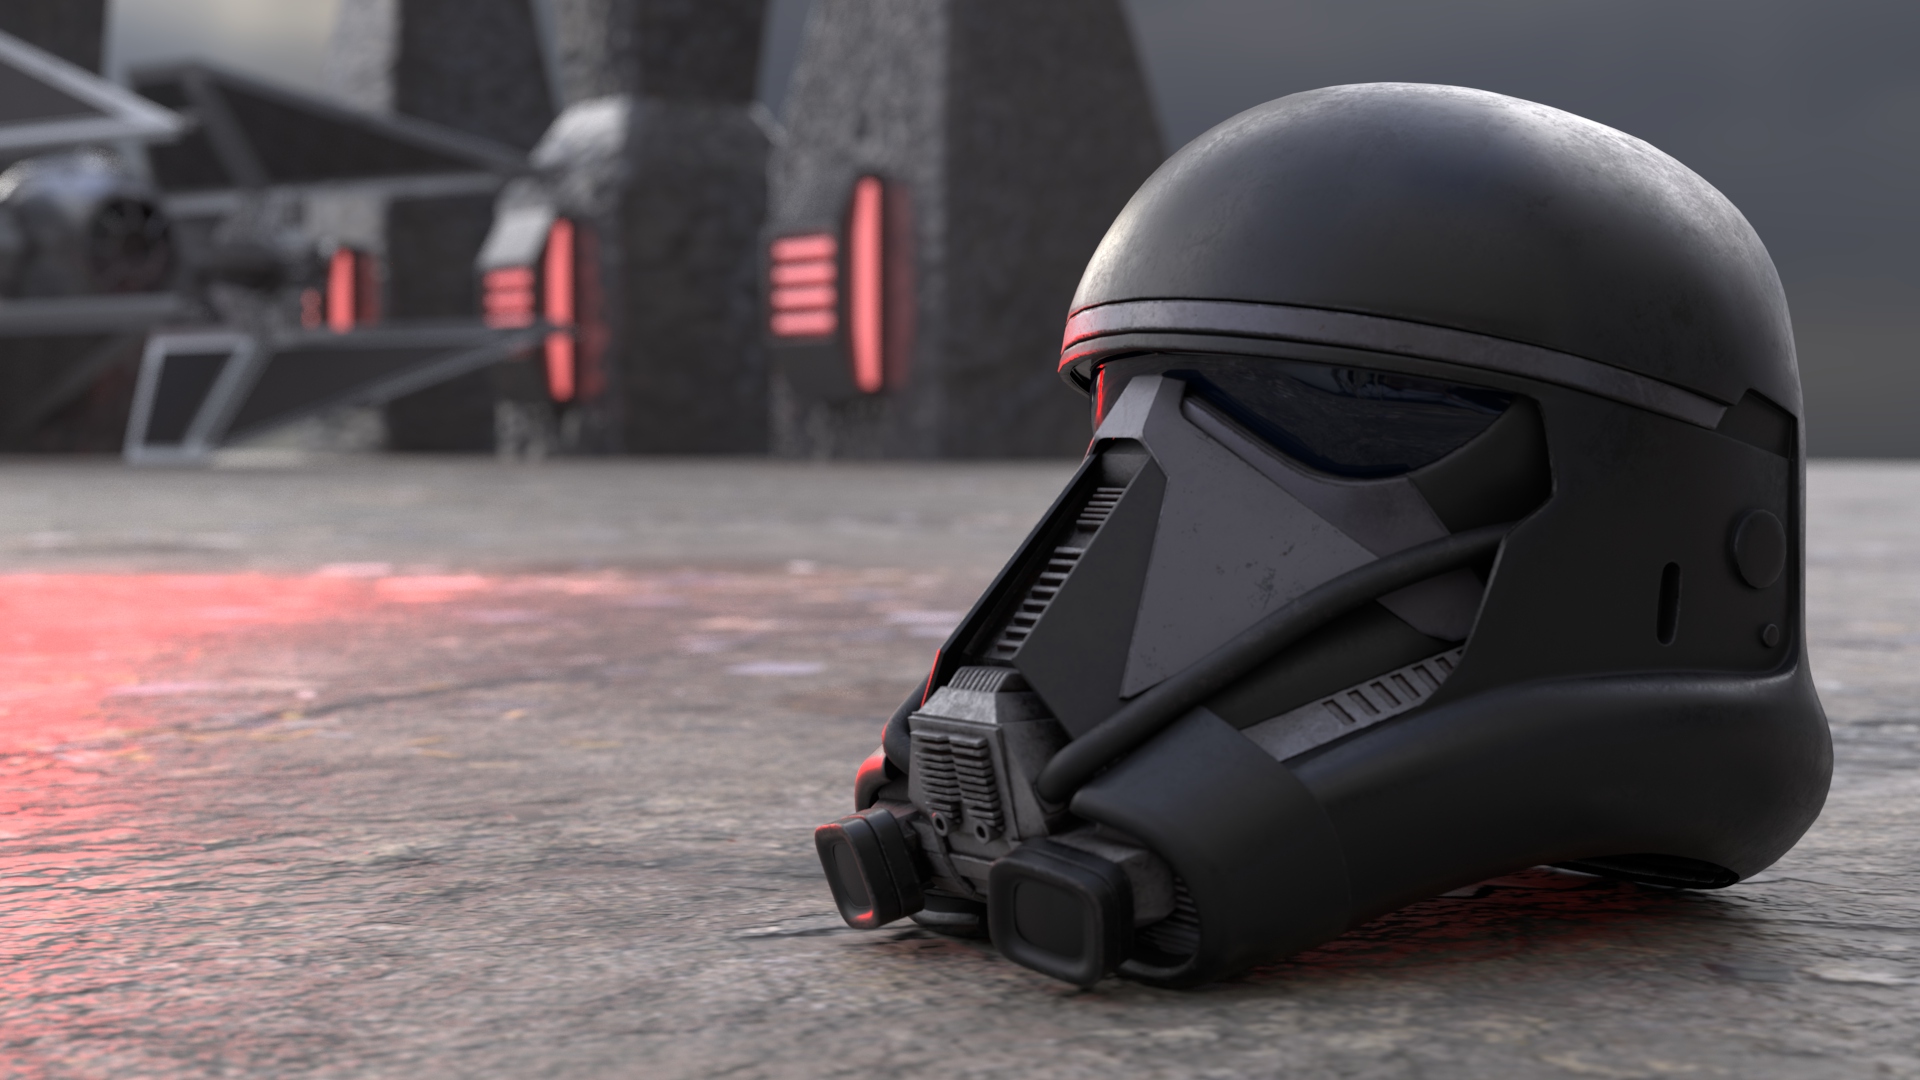
Classic black helmet
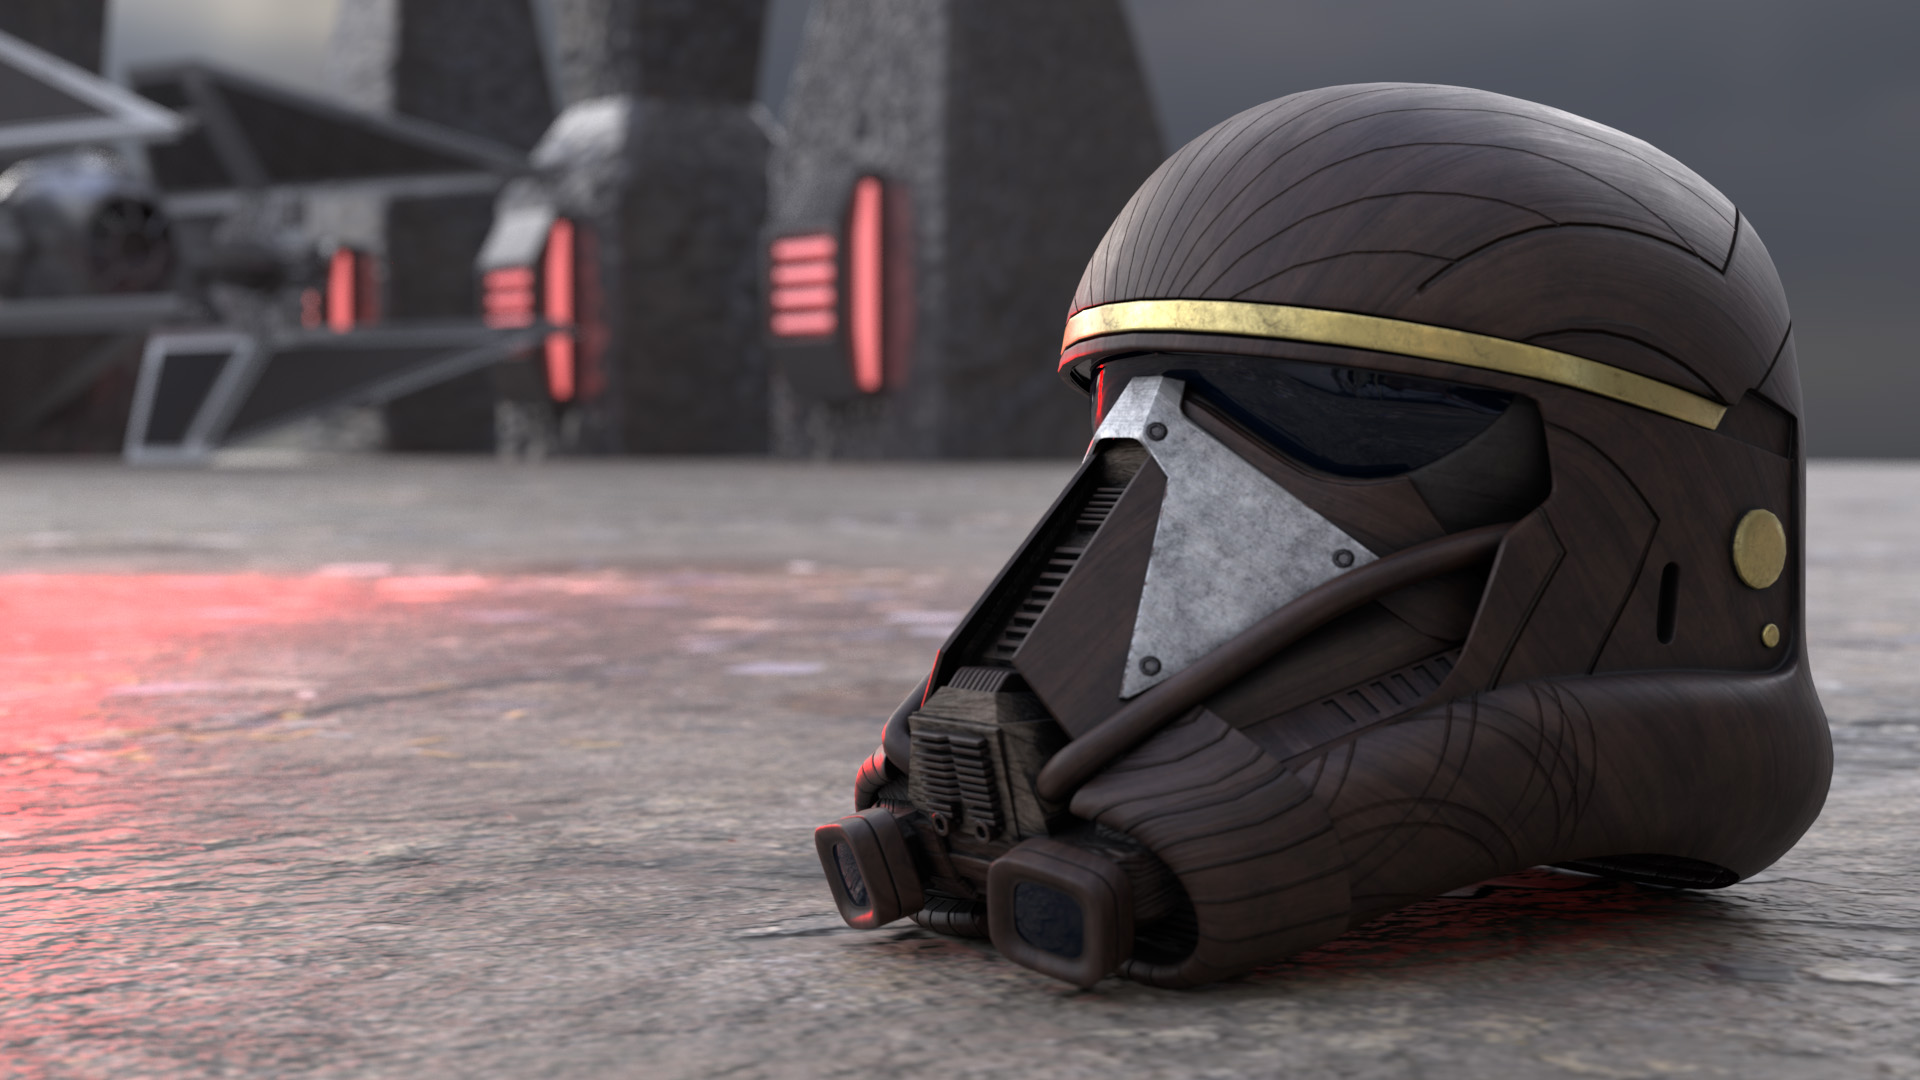
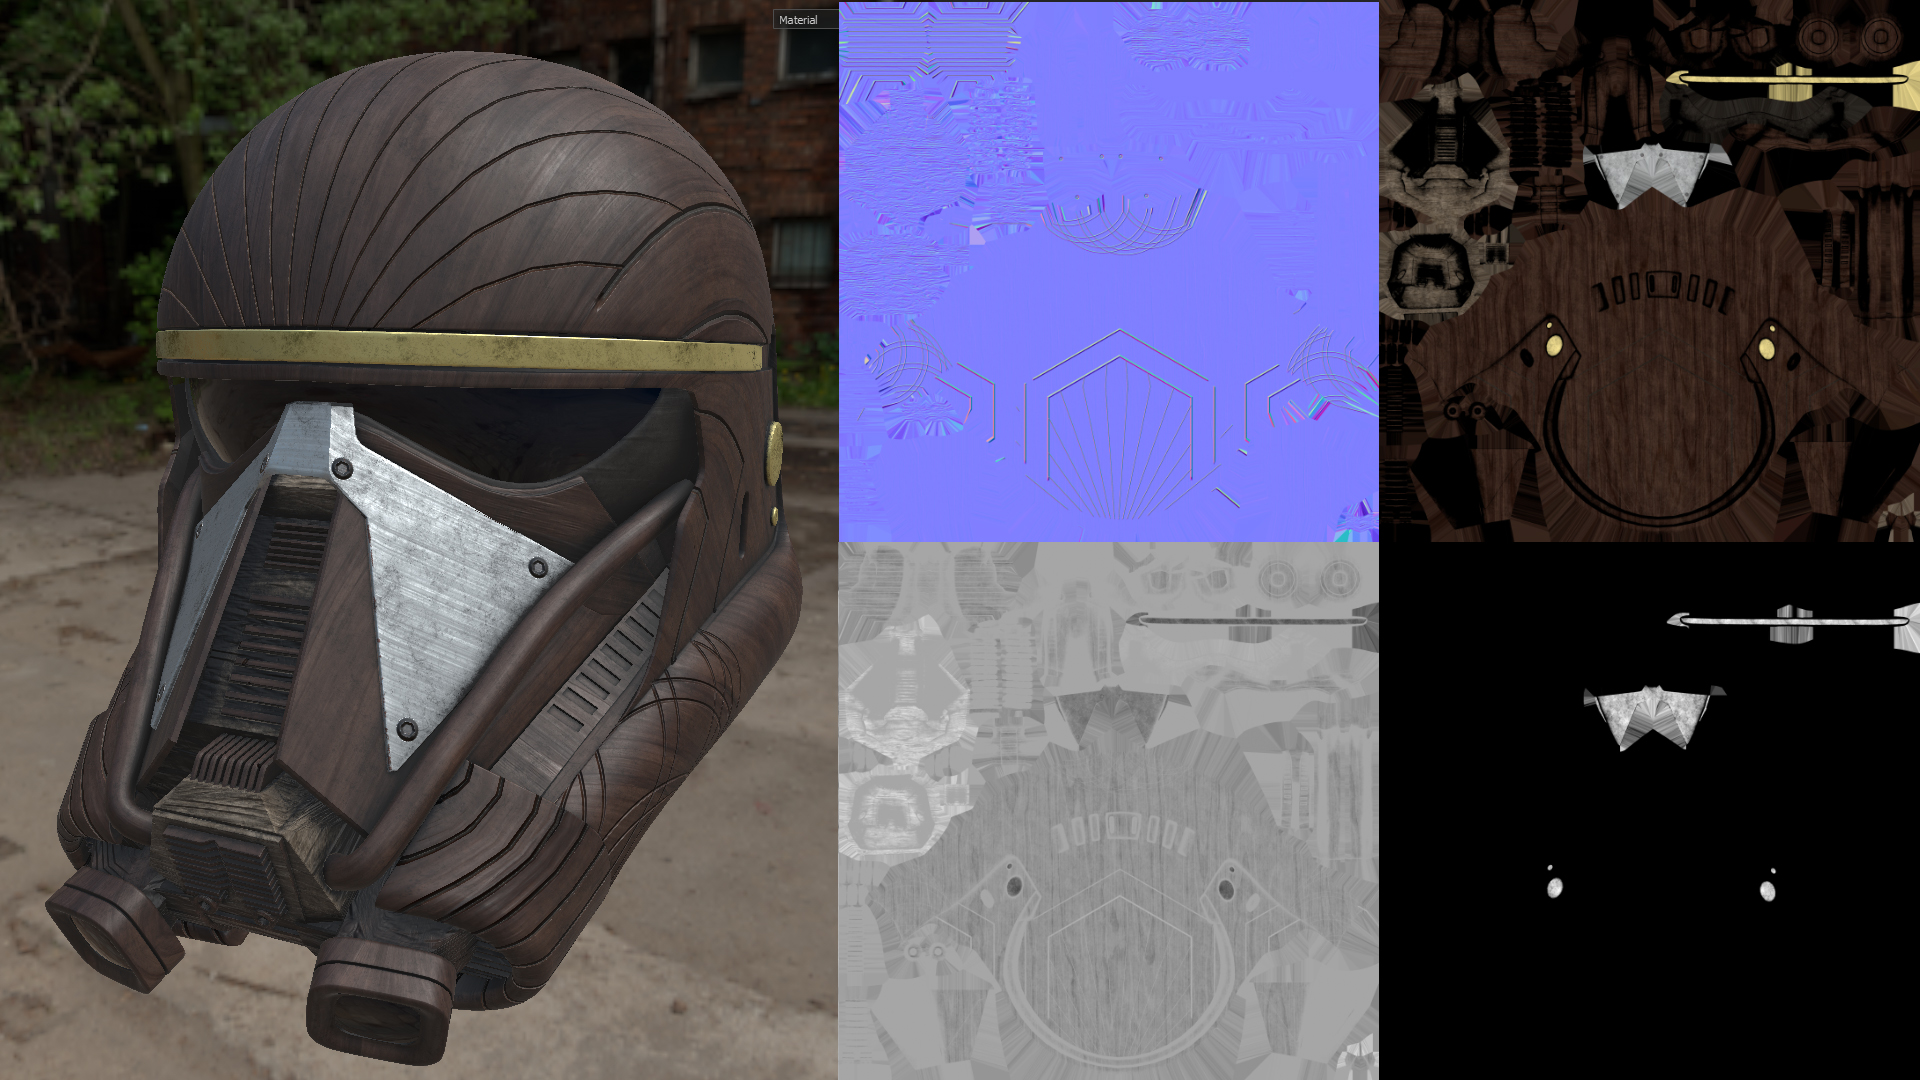
Wooden helmet variation
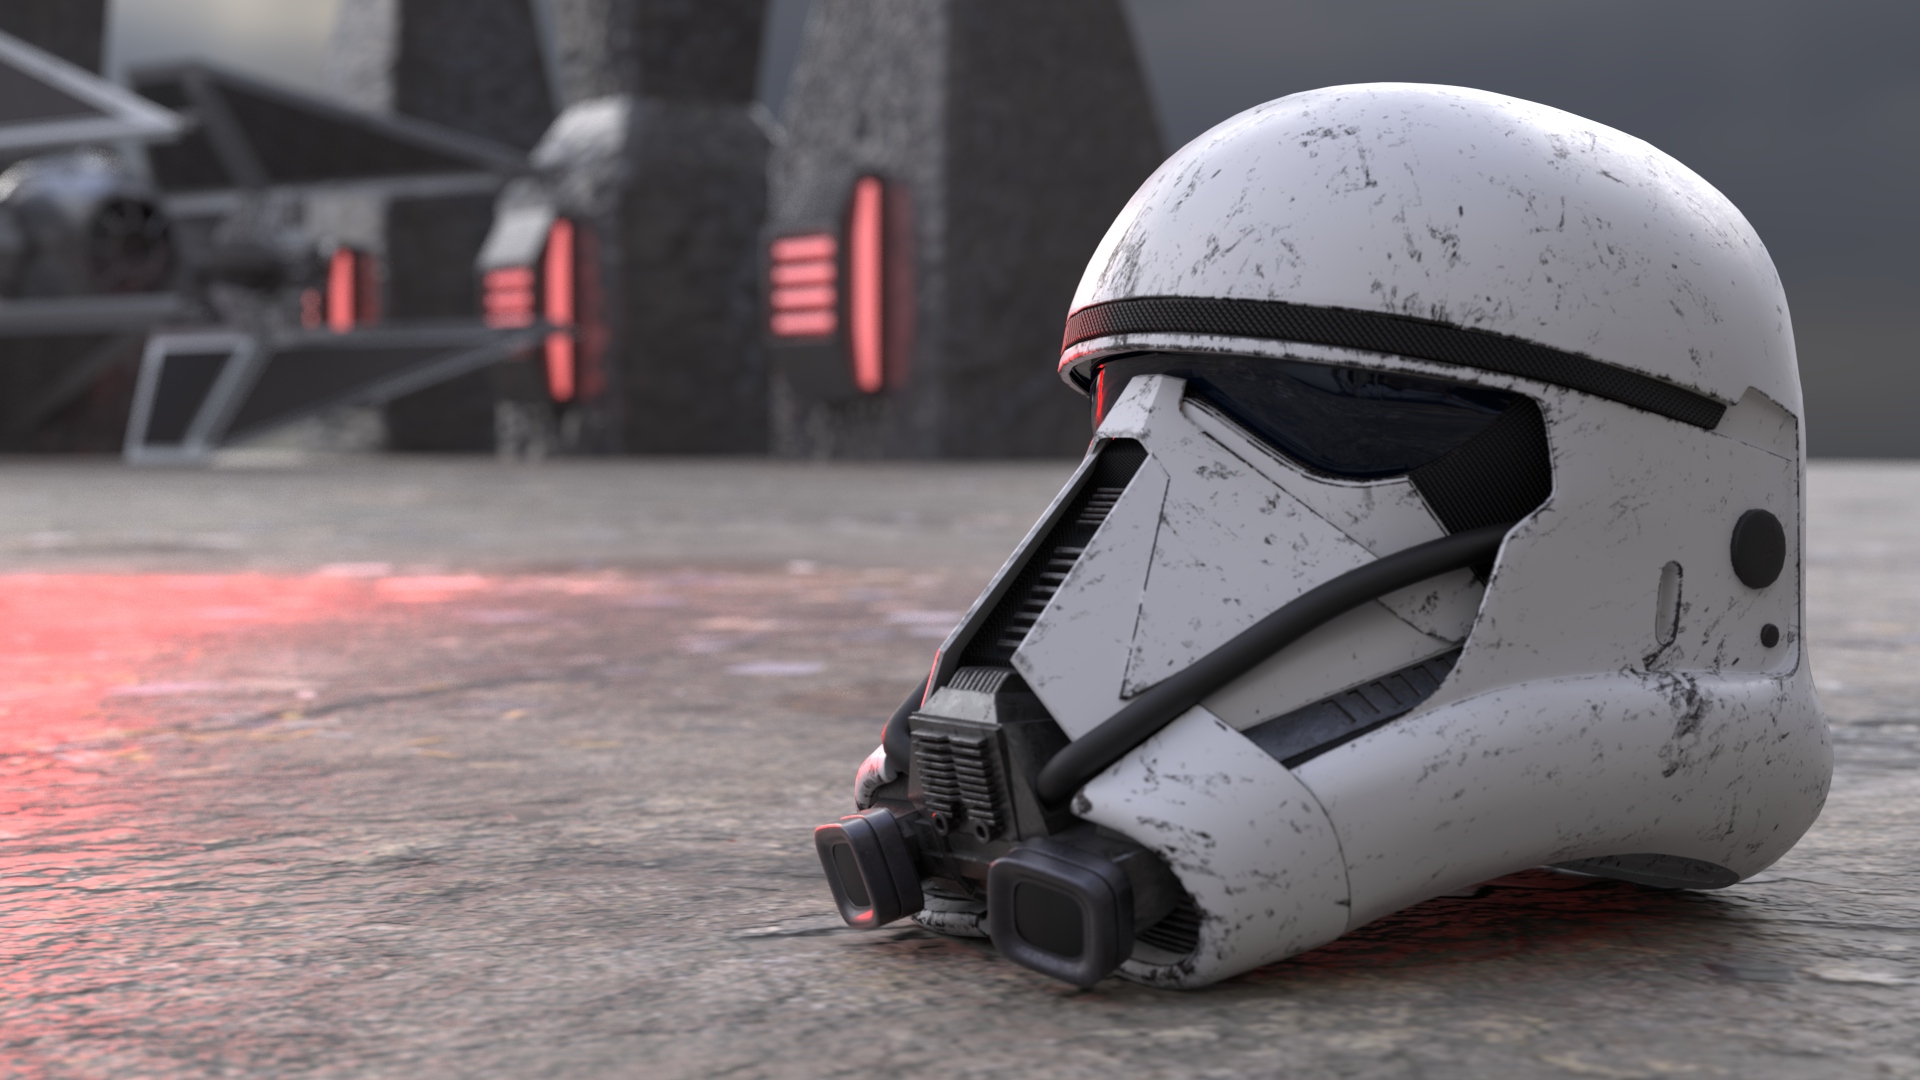
White helmet variation
Project Break Down:
Below is a breakdown to show some of my process I used for this project.
Introduction:
What was the inspiration for this project?
I wanted to create a 3D asset with interesting shapes that I could texture with Substance Painter. A project I had been thinking about at the time was to build a helmet from the Star Wars Universe that I can experiment with. I've always loved Stormtrooper helmets, especially the Death Trooper helmet from the movie Rogue One. So I decided it would be fun to build, and perhaps eventually use it in a short movie or game project.
Modeling:
I created this model in Maya, using modeling tools and image planes to match the surface detail and overall form. I modeled it with a low to mid poly count and kept it as clean as possible for the UV stage. Once I had a clean low poly, I subdivided it and cleaned up some of the extra edges that were not needed.
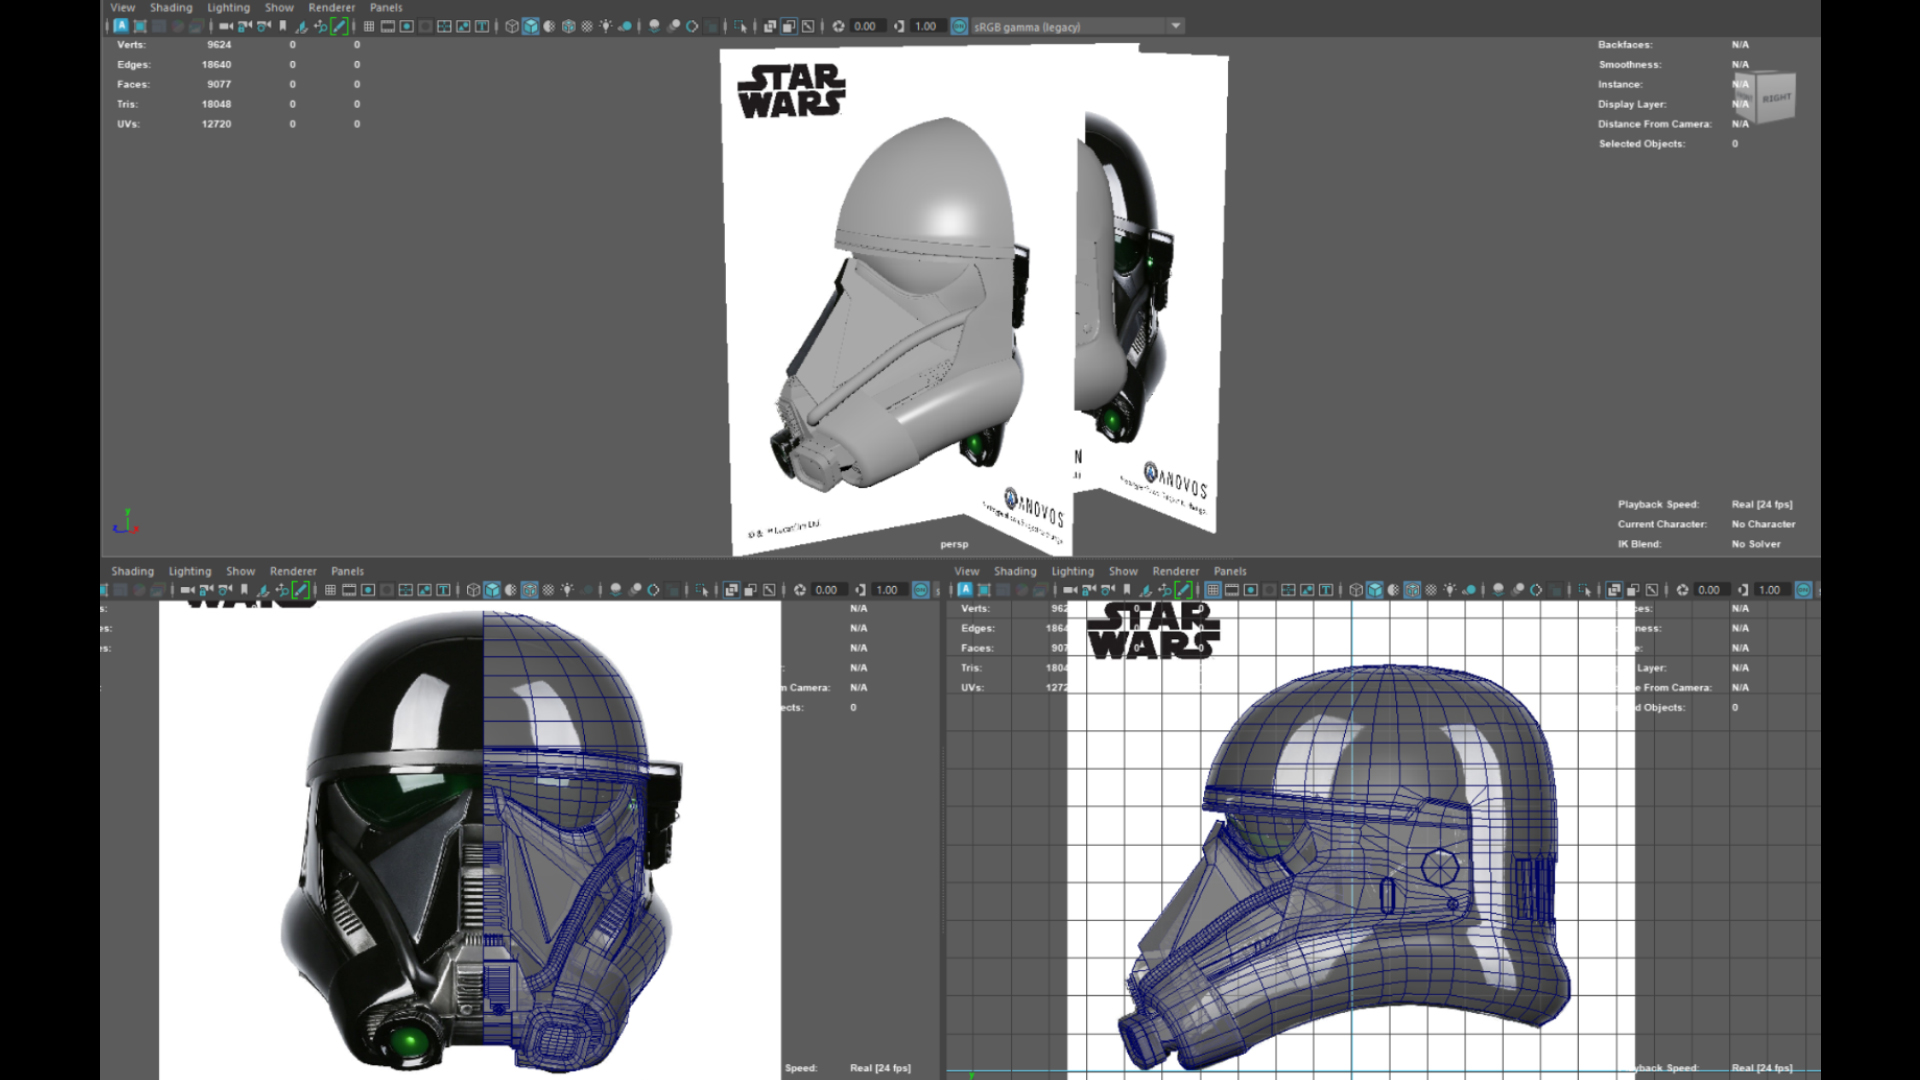
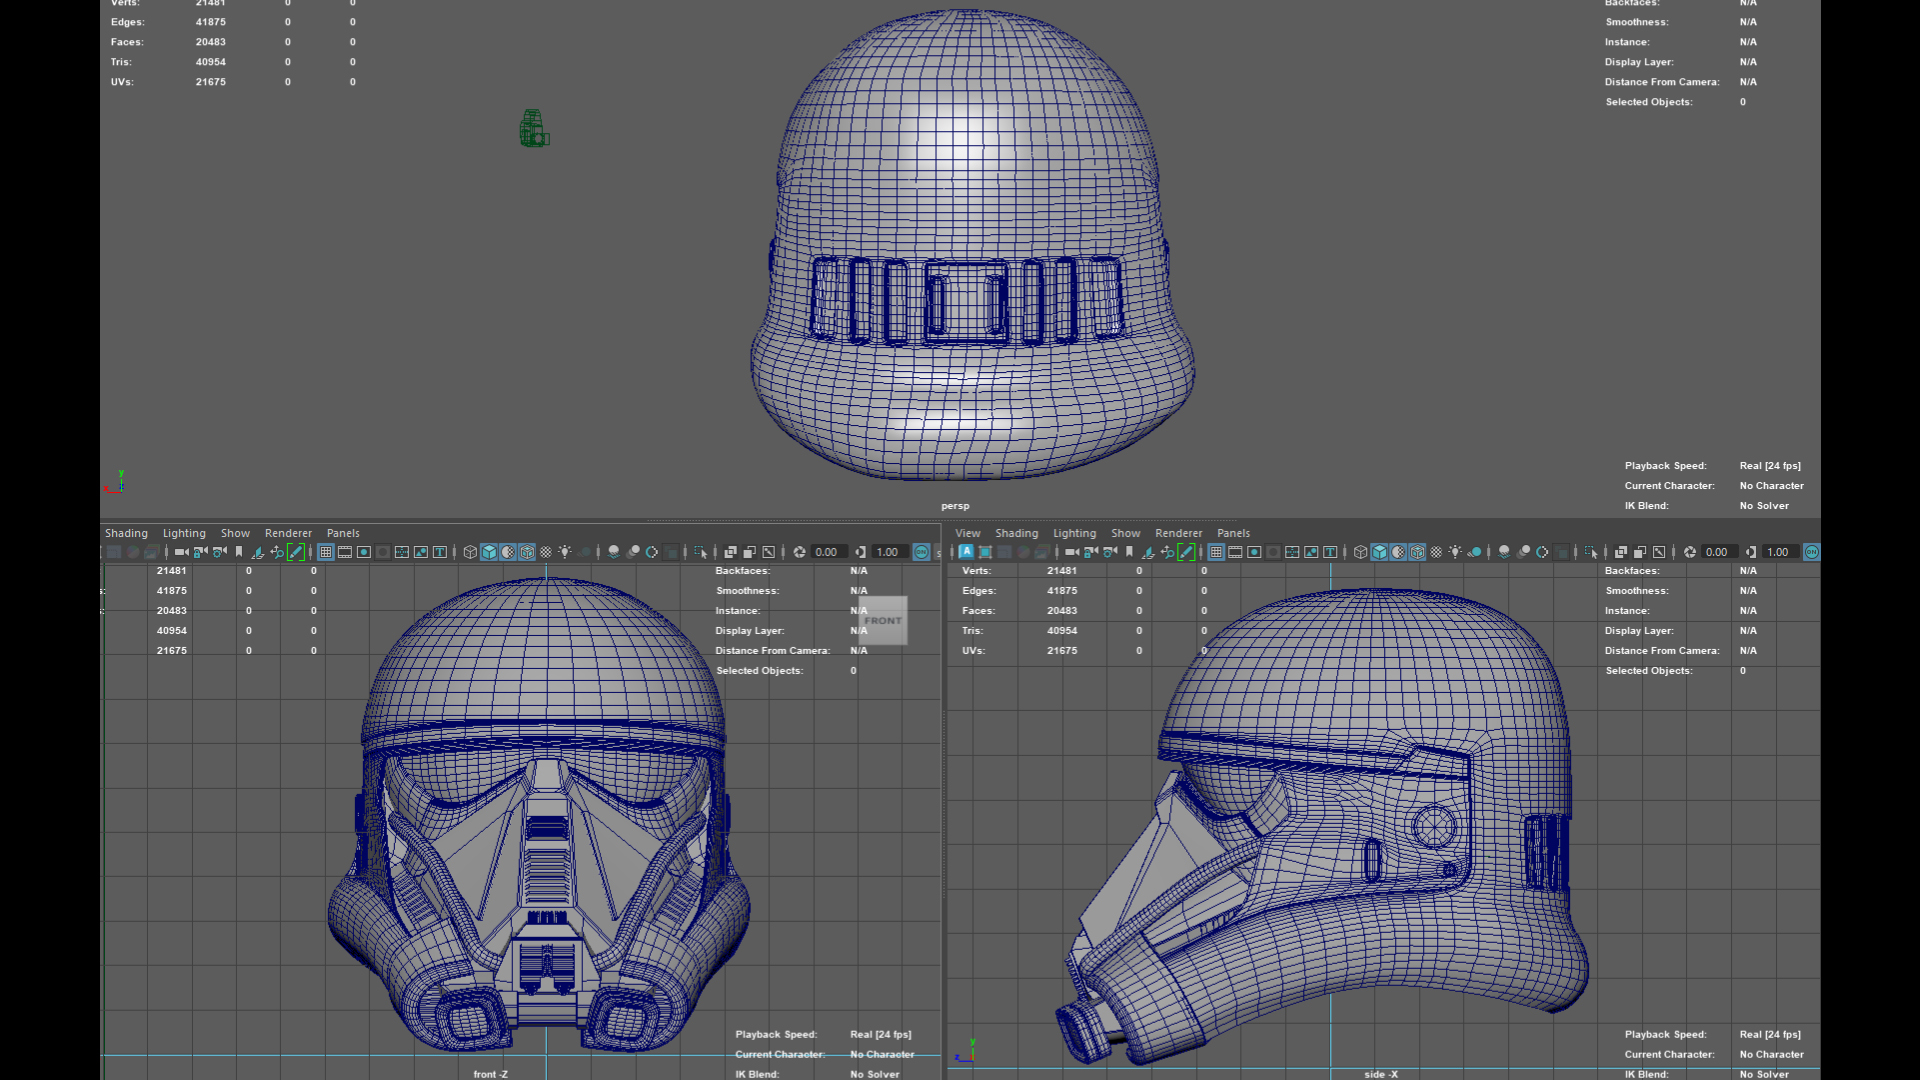
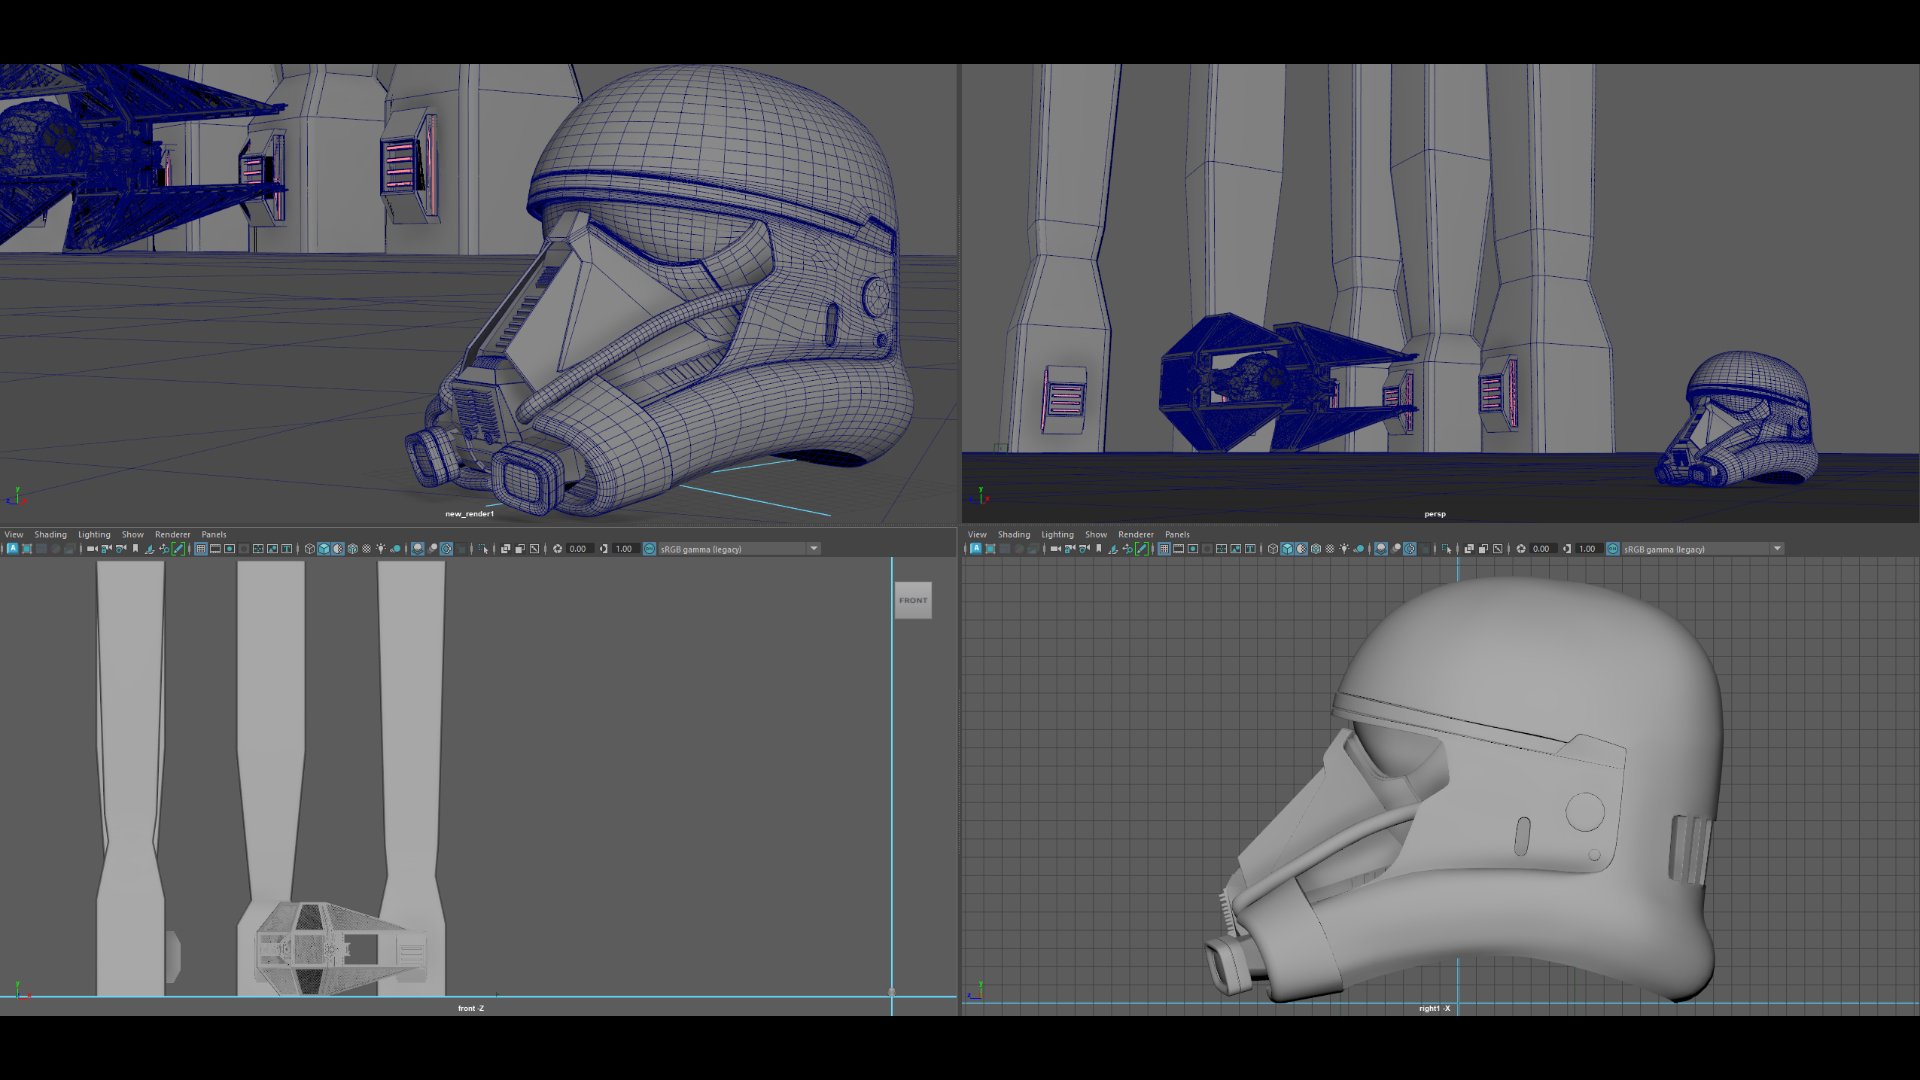
Final wireframe:
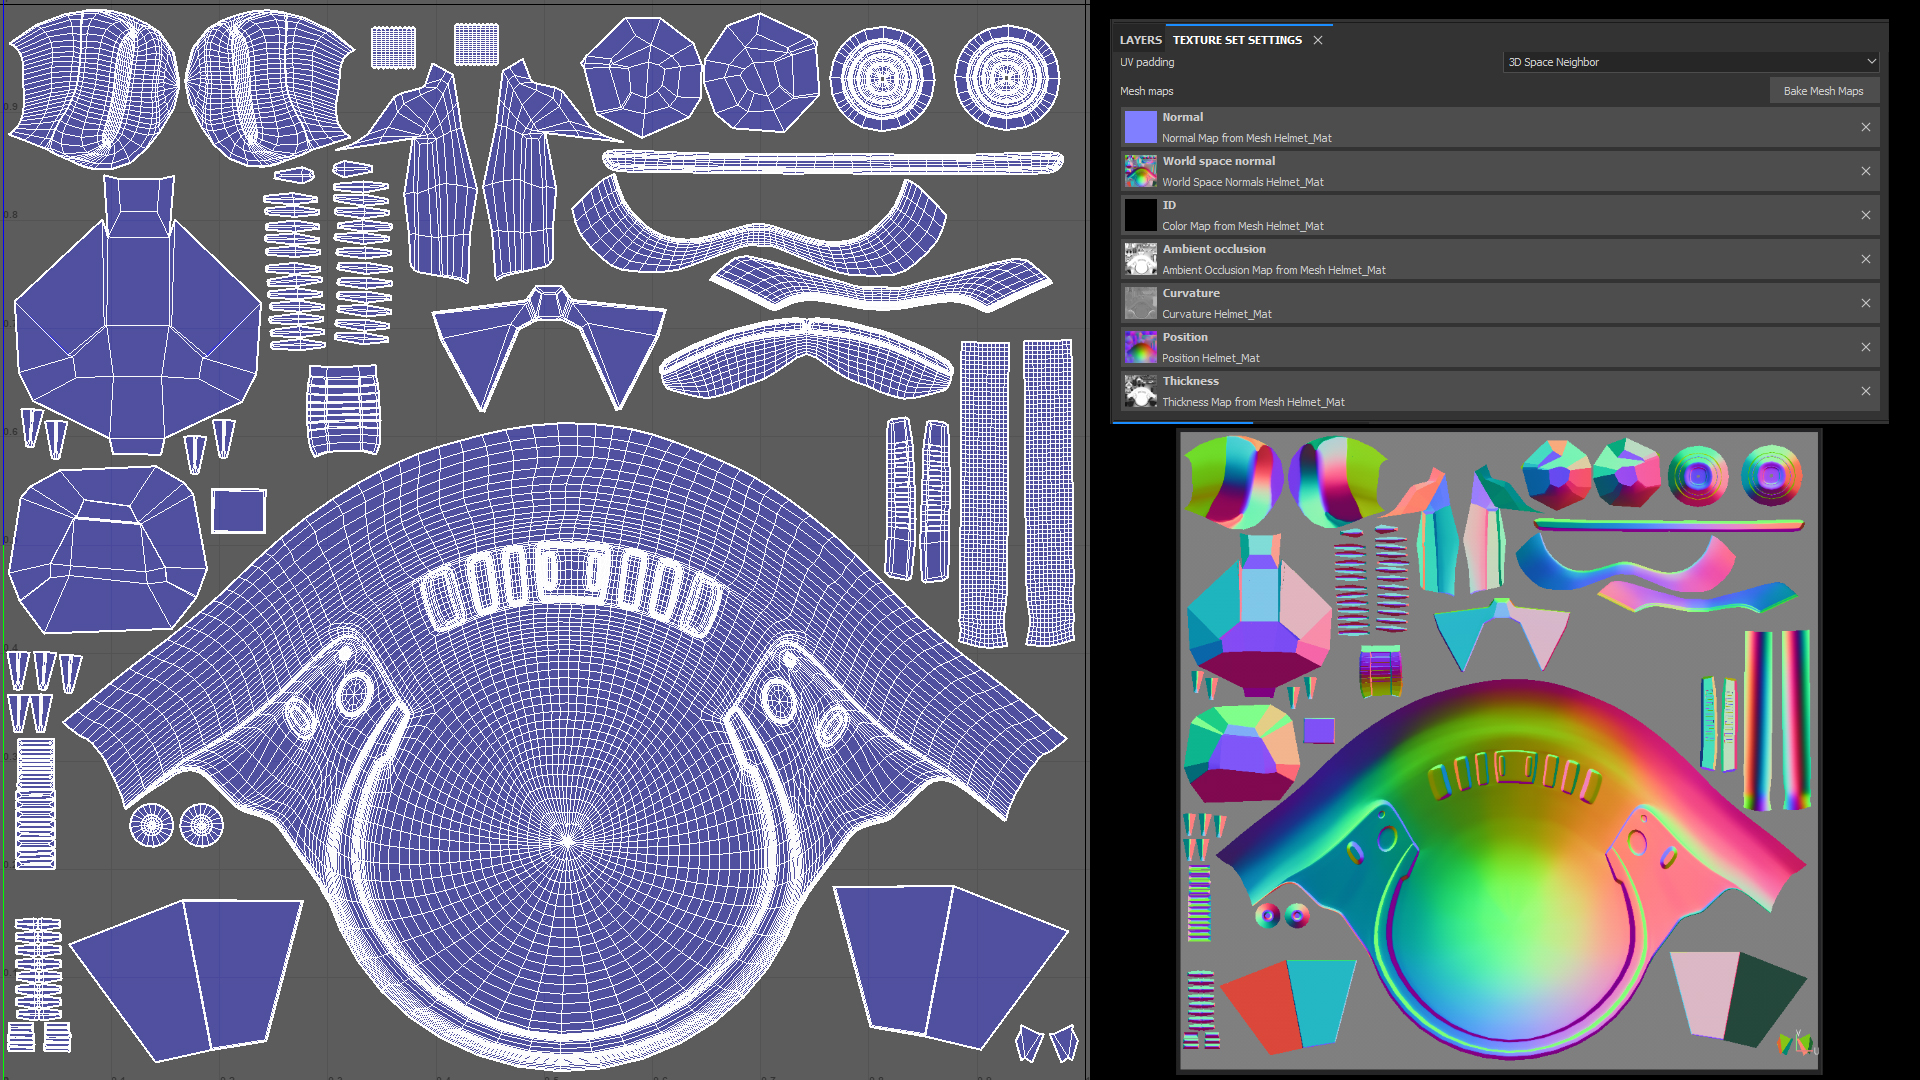
UV's:
I used Maya's built in UV toolkit for the UV process. I start by strategically cutting and sewing UV seams for each part of the mesh. I then started unfolding and optimizing the various UV islands of the model. During this process I scale and arrange UV islands to ensure texel density so that each UV island will receive the correct amount of texture detail. I also ensure there are no overlapping islands to avoid baking errors once in Substance.
Texturing:
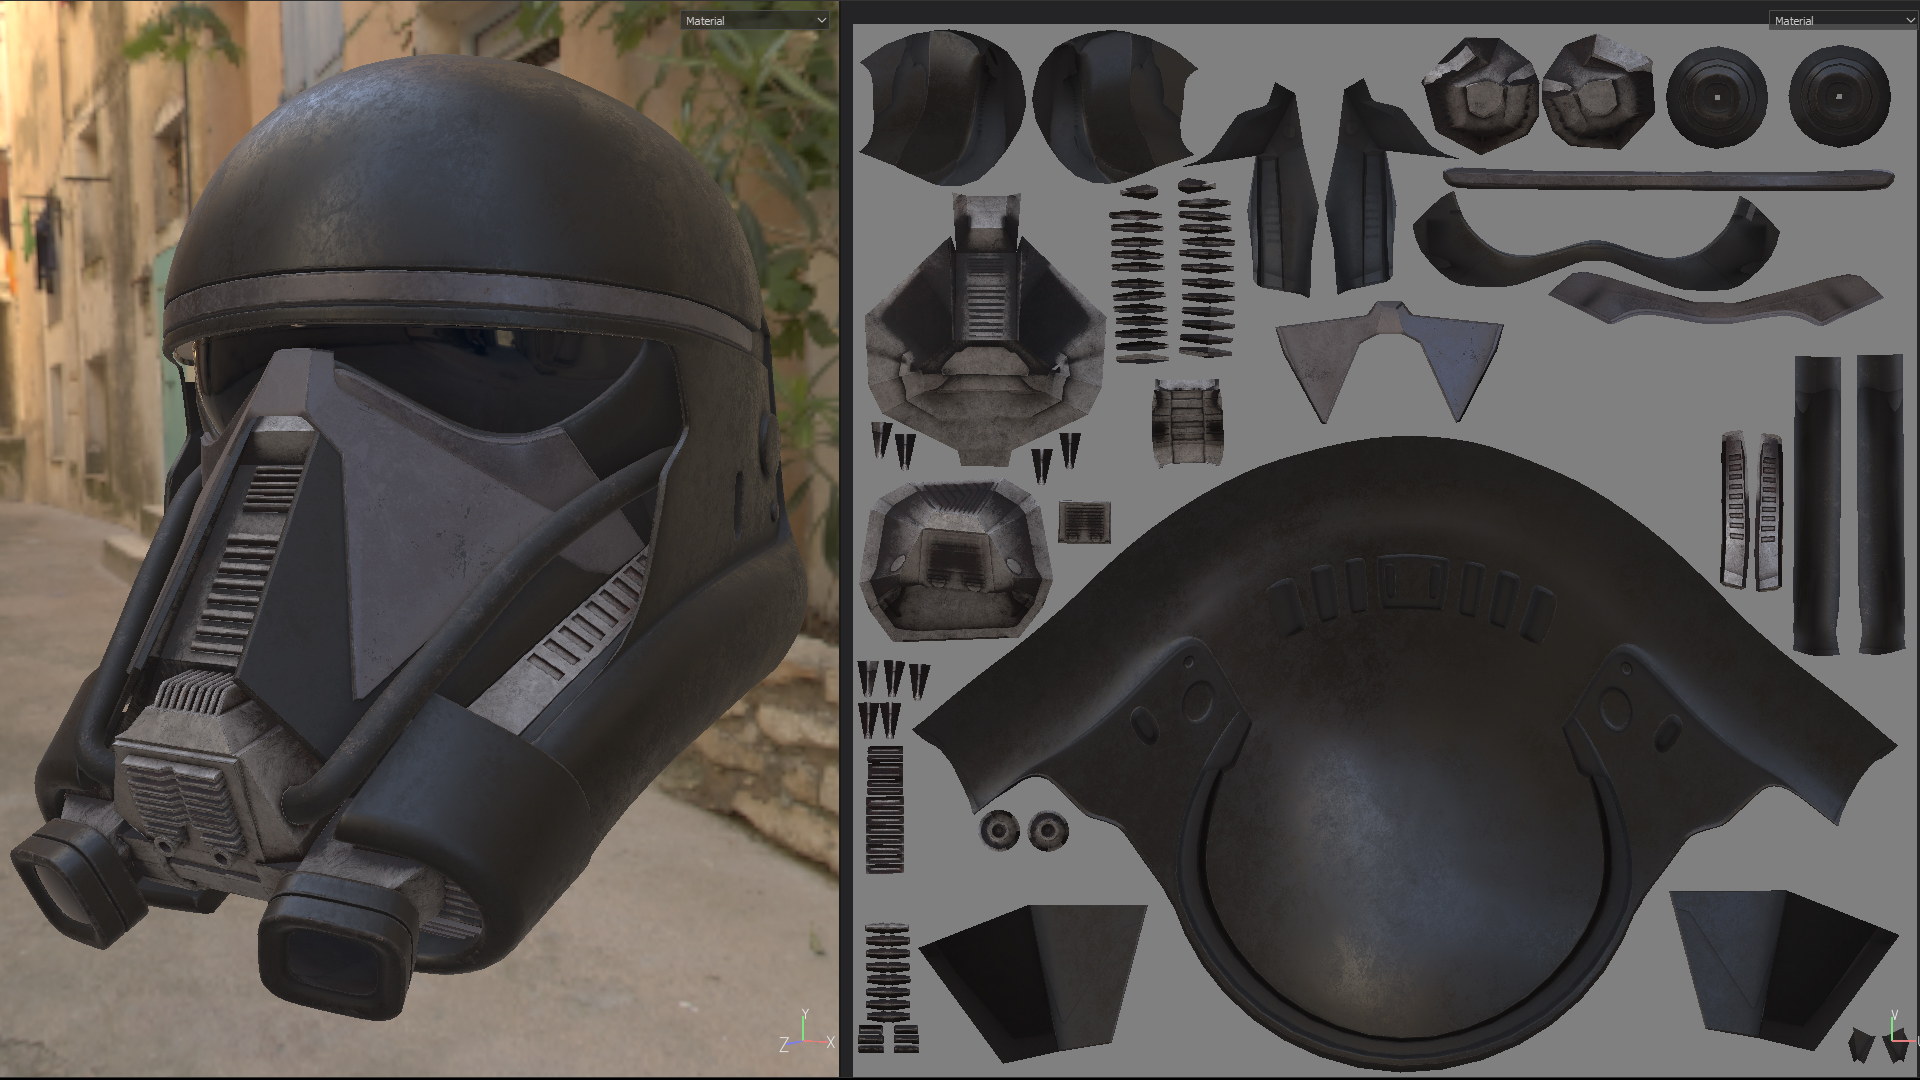
In Substance Painter I create a new PRB - Metallic Roughness project and import the model. I first bake out the AO, Curvature, and other maps. As long as there are no baking errors, I will then start creating layers and texturing. For layers I start by adding a base material to a fill layer and add it into a folder. I then create a mask to specify the specific parts I want the material to show up on. I continue to build up various layers and masks, utilizing generators, alphas, and grunge maps. Combining those with various materials, painting and blending modes. I add any specific paint layers or details as I go. Checking each channel and adjusting color, height, roughness, metallic and normal properties of each layer is crucial to the final look.
Scene Setup:
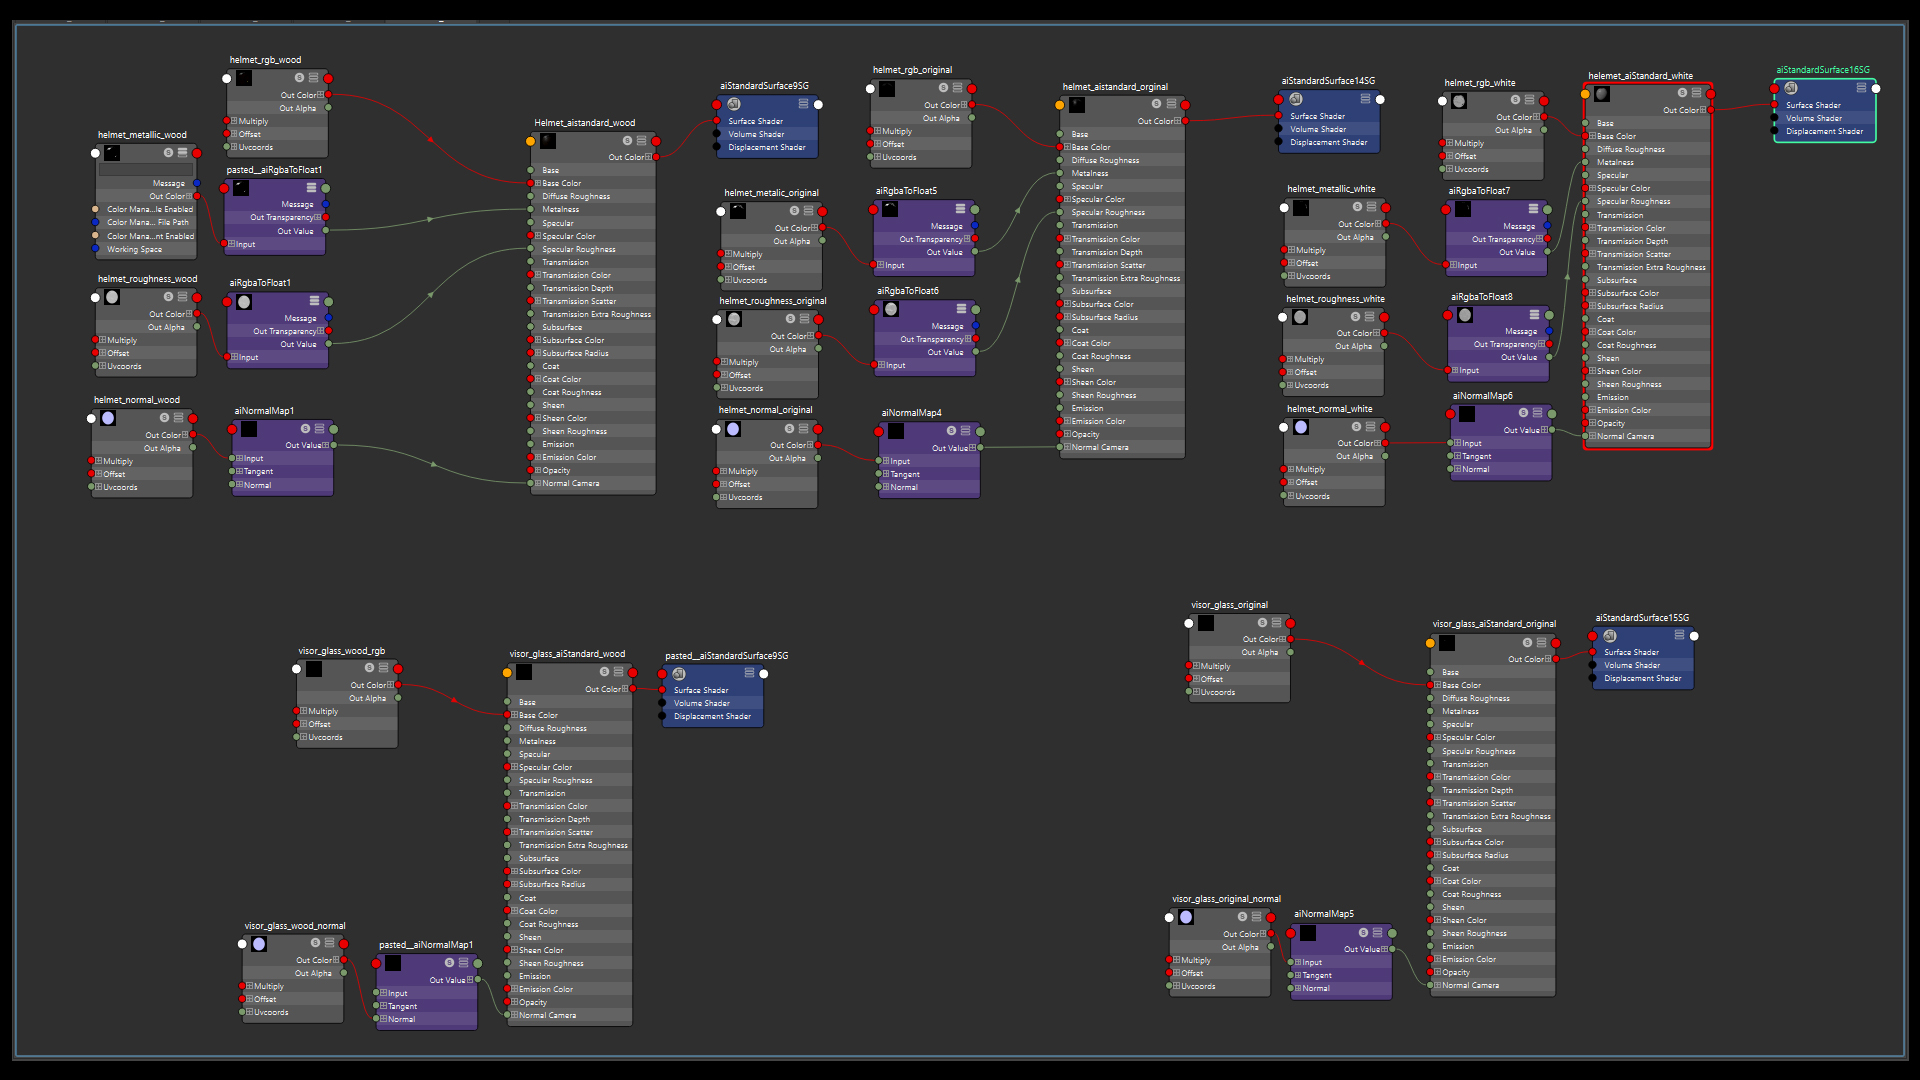
Back in Maya, I imported the textures I exported from Substance to set up the shaders. I used Arnold Render for this project, so I set up AIStandardSurface shaders and used AIImage nodes for the textures. Some additional nodes were used like "aiNormalMap", and "aiRgbaToFloat" for the roughness and metalic. I use sRGB color space for the Albedo texture, and set the other maps to RAW color space. I modeled some pillar elements, a floor, and imported a spaceship I downloaded and converted to add some background elements.
Lighting:
I used an HDR texture for the main lighting attached to a Skydome light. I also added some emissive materials to background objects, and a couple of area lights for additional lighting. I then adjusted the light settings to achieve the look I was going for.
Rendering:
Once I'm ready to create a beauty shot, I create a new camera, and arrange the elements to create a nice composition. I adjust camera settings such as Focal Length, Depth of Field (DOF) Focus Distance, Aperture Size, and other photographic settings to mimic a real world camera. Once I have a nice composition and Arnold is rendering decent test renders, I'll dial in the render settings cranking up the Sampling and ray Depth settings for a high quality noise free render. I may also switch over to GPU rendering if it's taking a long time to render with the increased settings.
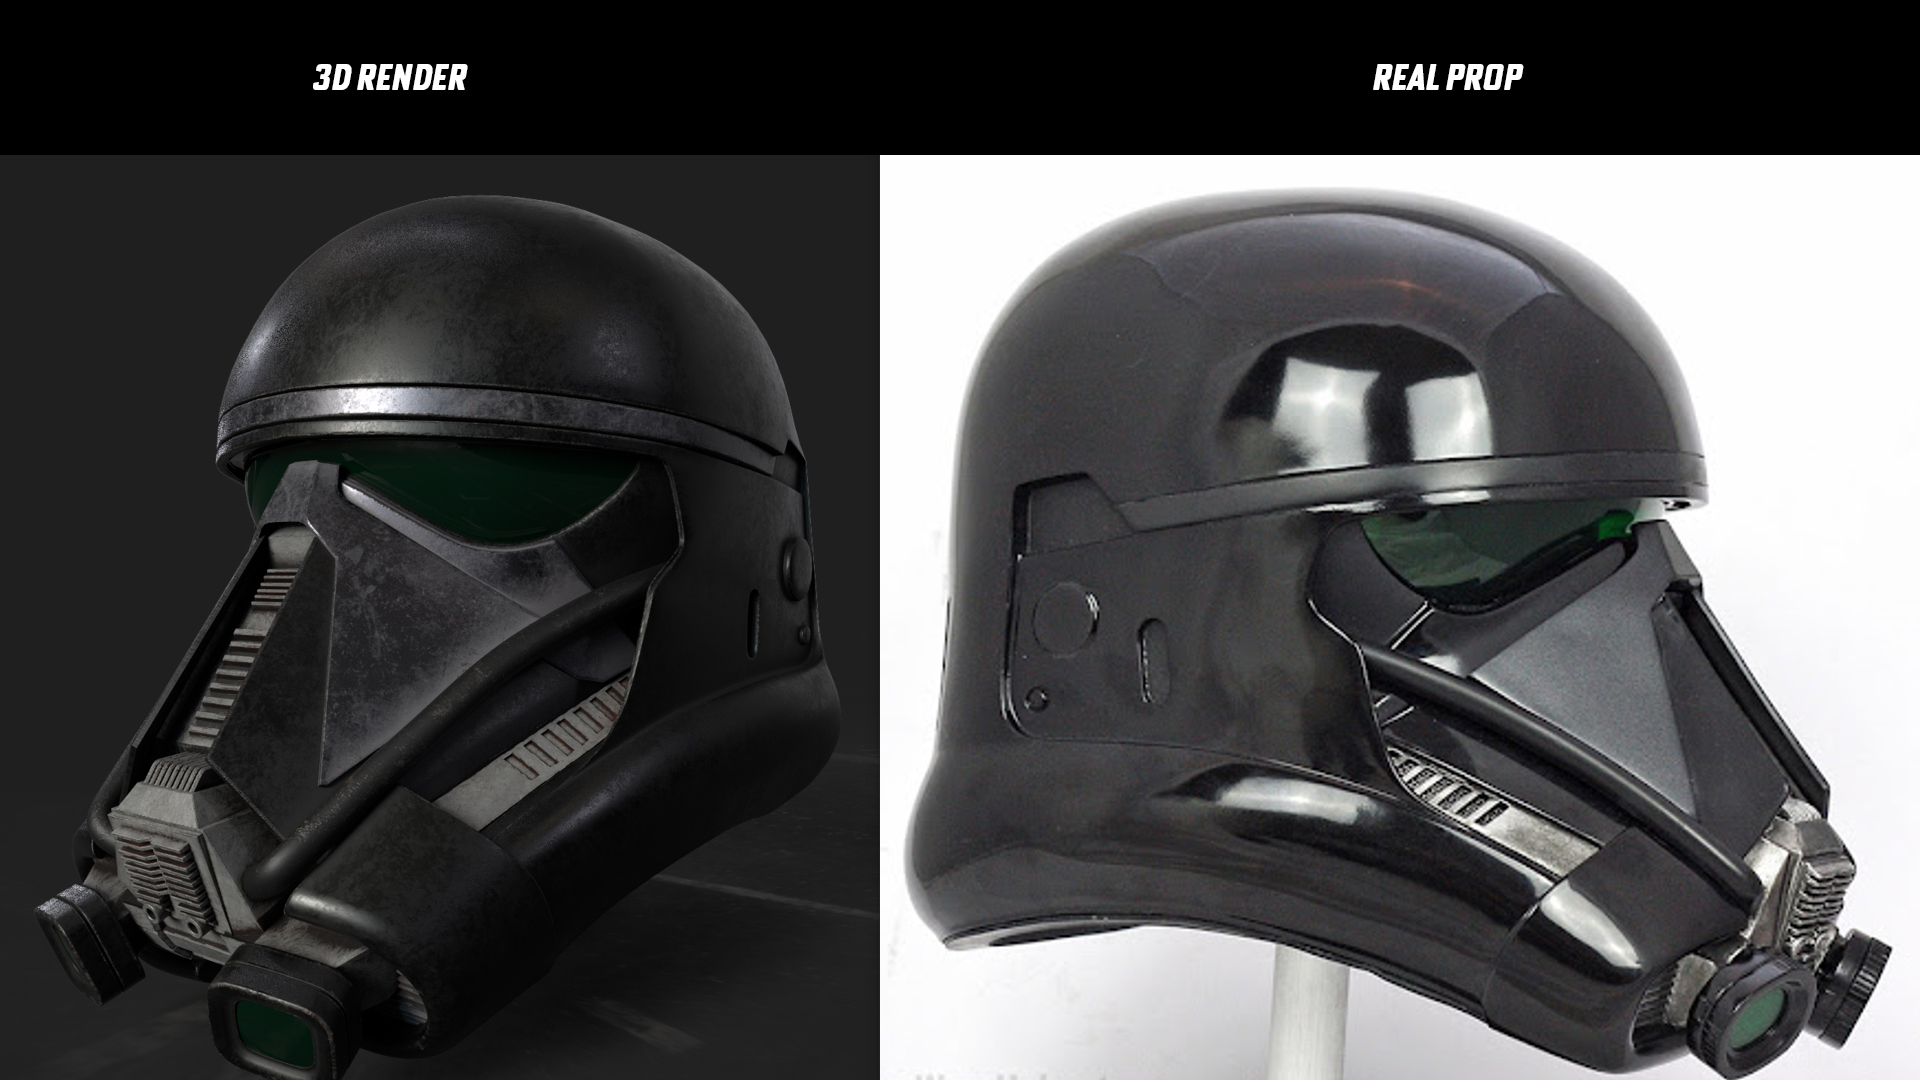
Comparison:
Render vs real world prop.
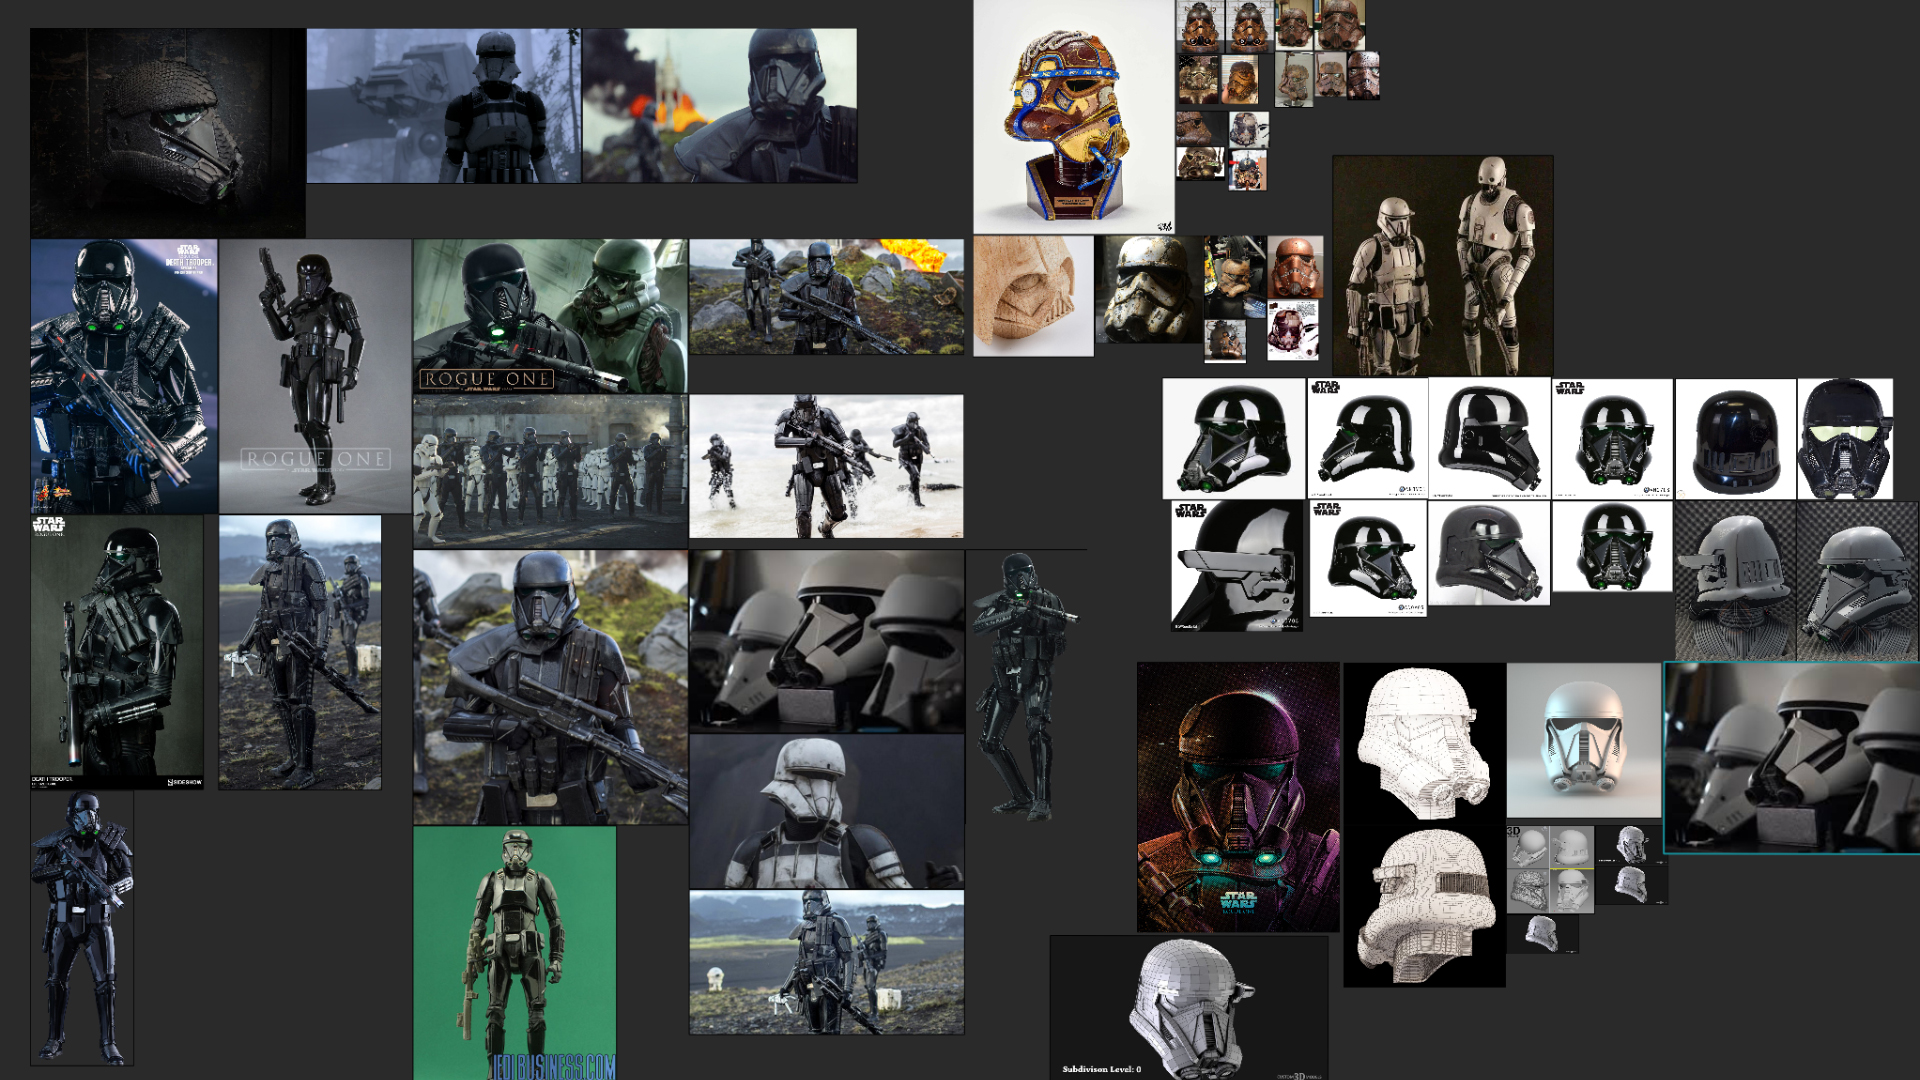
Reference:
Below are some of the reference images I gathered for this project. This includes, screenshots from film, orthographic real world reference, 3d images, and other interesting variations of helpful images. I like to use an app called PureRef to organize my reference as I'm working on a project and separate the images into respective categories.